Wednesday, 11 December 2013

Editing

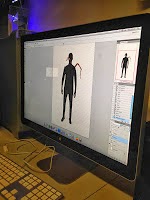
To start the editing process we we had to make sure the lip syncing fitted in with the beat and synced with the track, we also made a rough copy to start with as a base so we new where all the main parts fitted in. When we began to edit we decided that we wanted to test our photoshop ability and test ourselves so we created a 'monster; using a silhouette of a man, octopus tentacles and spider legs.  We put this in because we wanted to create a feel of extra presences with in the woods almost like she is being watch. 

How we made the frozen effect:

When editing we used the blade tol to cut up the part of clips to create a jumpy jittery effect during the video. 

Whilst editing we realised that some of the clips from the studio and the woods were different colour temperatures which meant that we put a blue/green filter on the clips to keep the colour the same, we went for blue/green because they are very cold dark colours which gave a really good eerie feel to it. 

Sunday, 1 December 2013

Website ideas

We have started creating our artists website on the online website creator called Wix. We decided to use dark gothic colours with a counteracting colour like green, which also symbolises her name. We put all the essentials like the company name, lizard king, new and events on the other page and merchandise which is where you can buy tshirts album vinyl. I felt that having news and events on her website was important as it makes the audience feel involved, we put images of Cece Green on her shoot day and also pictures of her everyday life which also makes the audience feel involved.

We linked her Facebook page and twitter page to the homepage so that if some of her audience want to follow her there they can.

we realised the more places we published her work in the better it was as people share and like her work.


These are some of the thsirt designs that we created on a website, this allows her fans to interact with her as well as promoting and selling our artist


Thursday, 28 November 2013

Evaluation of shoot day


I felt that our shoot day we to plan and that we kept the schedule reasonably well, although the make up took a lot longer than we thought which did throw our schedule back a bit but we still manage to catch up as somethings were faster than others.
The day before the shoot there wasnt a lot we could actually do to set up as we needed the black screens before we added the ink and scratch into them. But we made one of our sets which was the scratched ink which we ended up hanging over the top of the blank wall.


We used cardboard to create the greyish scratched effect, and instead of using ink we used black acryic paint with water which worked better and dried faster.
The day before I also ran through the lyrics with our main artist to make sure she was confident with them as it would looked much more professional if the lip sinking worked, and because she isnt english she had some problem pronouncing some words. We also made sure that we had all the props ready and practiced the make up and dance routine.
As a group we were confident for our shoot day as we had a lot of time, because we were the last group to shoot, so we could practice and test things like the set, dance, make up and made sure that we had everything we needed and knew exactly what we wanted so there was no time waisting.

Because the makeup took longer than we thought to went into our schedule, although we planned to do the make up straight after breakfast before the shoot started. We just changed the schedule around and shot the dancers first as the had the least makeup on so it gave us time to make sure the twins and artist had the right makeup we wanted. We also put up our set hanging up the sheets on the blank wall in the morning ready to shoot. As well as testing the lighting effects and colour of the filters to make sure they were right. 
When we started the shoot we had a huge blank wall which we were using to clip up the different sheets as we needed the ink wall, the scratched wall and the blank wall for ben to right on. This made it easier because after every scene was done we just unclip the sheet and attached the one we needed onto it. The concept of our idea that we had in our heads was the same as it looked for the shoot, this is because we spent a lot of time testing out the set with different mediums of inks and types of walls to do it on so we knew it would work.
Through out the day we manage to divide the up the roles so that we all had a chance to try out every role, because the make up was taking a long time, me and alicia helped with the make up ( we had organised a makeup artist to help us as we needed it to look professional) but it was taking too long so we help with that, whilst chessie was running through the dance with the dancers making sure they knew what they were doing.
The roles were divided out during the day to make sure that we all got to try out different things. In the morning Me and Alicia helped with the makeup to save time (we had organised a make up artist) whilst Chessie was running through the dance with the dancers making sure they knew what they were doing.  But through out the day we changed over different roles, like director, camera man and recording with iPad and standing on the side of the stage shouting to the artist and dancers what to do. This meant that we could all understand what it was like and also learn something.
We found some old smoke bombs during the filming which we last minute decided could work for the shooting on location in the woods. We were surprised as we were not sure how they would work and only took them to test, but, they ended up looking really edgy on the camera. Another thing that went better than I thought would was Ben's scene we managed to make it look really cool, we held the camera in one hand and pen in the other so it looked like the camera was the pen. This scene looked really cool on the big screen whilst playing it back.
Our actors were surprisingly good as we were not sure that the lip sinking would be good or they could be awkward but on the day the atmosphere was really up beat which meant that everyone was comfortable with everything that they were doing. As a team when we were directing the actors we had to make sure that we were really controlling and told them exactly what we wanted them to do otherwise they would have no idea and could make the video look awkward.
I think that after todays shoot that the editing to should go well, this is because our group worked sufficiently and close and we all shared roles making it easier for all of us.


This is a video of the rough cut which we made the day after the shoot.
Location tour

As a group we went for a location reeky to the location we want to shoot at. We wanted to shoot whilst driving through the woods so we would get the sun shining through the woods whilst the camera is moving.
On the way to the Peaslake woods we stopped off on the side of the road to see some other woods which we would shoot too. It was 3:00 in the afternoon which we realised was perfect lighting for when we need to shoot as the sun was just going down so it was setting on the trees shining through creating french light.
We new we couldnt use the woods on the way because it was to thin so you could see through them and we want a deep wood, and the wood also had too many fallen leafs.

This is an an image of the woods to the location, you can see that they are not deep enough for the shots that we want. They aren't spooky enough for our target audience.


This is the orginial woods (the peaslake woods) which we have wanted to shoot some of the artist at, you can see the difference of them they are more scary and deeper and have a funny era about them. We new that they would work better than the other woods because they are more scattered and thicker rather than being in straight lines and hollow.


This is a panarama of the area which we are going to set up the camera to shoot. We aim to shoot at 2/3:00 so we get the right light for the clips.


This is a quick video that we made, it is a rough copy of what the begining of video will look like and it will just to the beat. We want sudden cuts of the artist getting closer to the camera to the beat, as we think this is a very strong idea to start the video with. 

Friday, 22 November 2013


This is the start of website for our artist, we havent yet shot the artist for the pictures so we used templates to start with. We want a large image of the artist with her quirky makeup as the main image as i think it will be capturing for our target audience which is alturnative rock

Wednesday, 13 November 2013

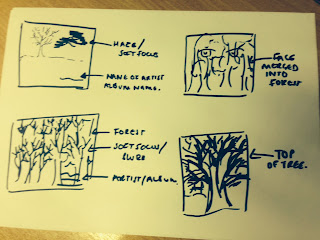
designing our cd covers

samples of our drawings


We wanted to keep the theme of the dark mood with threes soft focus images which related well to our vidoe, however, we think that it if we related it too much to the video that it will make it look like a single album and not an album so we further researched into alturnative rock covers from other artists.
We found that most of them were cartoon based which we dont want to do but stumbled apon a few ideas which influenced us.  We then drew out other ideas of random doodles and drawings too.

This image we stumbled apon whilst searching alternative album covers. I really like the mood of this image but if we did something similar we would make it moodier to suit our alternative rock target audience.


Friday, 8 November 2013

experimenting for set design

PVA glue and ink
This one is a little bit too think we think because it doesnt give the black rain effect that we want. 

Ink with a little bit of water
Our group decided that this ink one was the best as it runs down smoothly and created a better merging pattern on the paper
end product
first try to make wall look scratched and dirty
better version of dirty scratched wall
ink and water dripped onto dirty scratched paper
after scratching the paper we decided that the bottom experiment was the better as it looked more dirty rather than perposful. we also liike the ink with water dripping on to it.

Wednesday, 6 November 2013

presentation of peaslake woods


album research power point


make up idea power point


shooting schedule


Time
Shot no.
Shot Description
Actors
Props
9;00
1
Establishing shot, panning out further to reveal blank wall, and boy.
Ben
N/A
 
2
Pan In towards Boy.
Ben
N/A
 
3
Close up to ben beginning to write one wall.
Ben
pen
 
4
Extreme close up of pen on wall.
Ben
pen
 
5
Extreme close up of Writing.
Ben
pen
 
6
Close up of boys profile.
Ben
N/A
 
7
Panning out from wall, to establishing shot.
Ben
N/A
 
8
Mid shot of writing on wall.
Ben
pen
 
9
Panning up the wall.
Ben
N/A
10;00 – 11;30
1
Extreme close up of hands chained together
Twins
Chains
 
2
Wide shot of twin in blank room
Twins
Chair / chains
 
3
Pan around the twins sitting in chairs
Twins
Chair/ chains
 
4
Close up of twins face
Twins
N/A
 
5
Pan from floor up
Twins
N/A
 
6
Movement of holding hands, close ups.
Twins
N/A
 
7
Twins standing together
Twins
N/A
 
8
Twins apart
Twins
N/A
 
9
Twins turning
Twins
N/A
11;00 – 1;00
1
Close up of artist
Artist
N/A
 
2
Ecu of mouth
Artist
N/A
 
3
Mid shot of artist
Artist
N/A
 
4
Establishing shot of artist
Artist
N/A
 
5
Establishing shot of artist and twins
Artist
N/A
 
6
Pan around twins and artist
Artist
N/A
2;00 – 3;00
1
Extreme close up of hands
Dancers
N/A
 
2
Extreme close up of feet
Dancers
N/A
 
3
Panning up and down of dancers and movement
Dancers
N/A
 
4
Close up of ‘flowy’ dress.
Dancers
N/A
 
5
Establishing shot of dancers
Dancers
N/A
 
6
Mid shot
Dancers
N/A
 
7
Panning alternate way in comparison to movement of dancers.
Dancers
N/A
3;00 – 5;00
1
Moving footage of trees wide shot
Woods
N/A
 
2
Moving footage of trees close up
Woods
N/A
 
3
Blurry out of focus ecu of branches / mud
Woods
N/A
 
4
Establishing shot of artist
Woods
N/A
 
5
Establishing shot of Artist and twins
Woods
N/A
 
6
Establishing shot of twins
Woods
N/A
 
7
Mid shot of twins
Woods
N/A
 
8
Mid shot of artist
Woods
N/A
 
9
Mid shot of artist and twins
Woods
N/A
 
10
 Ecu of artist
Woods
 Bugs
 
11
 Ecu of twins
Woods
N/A